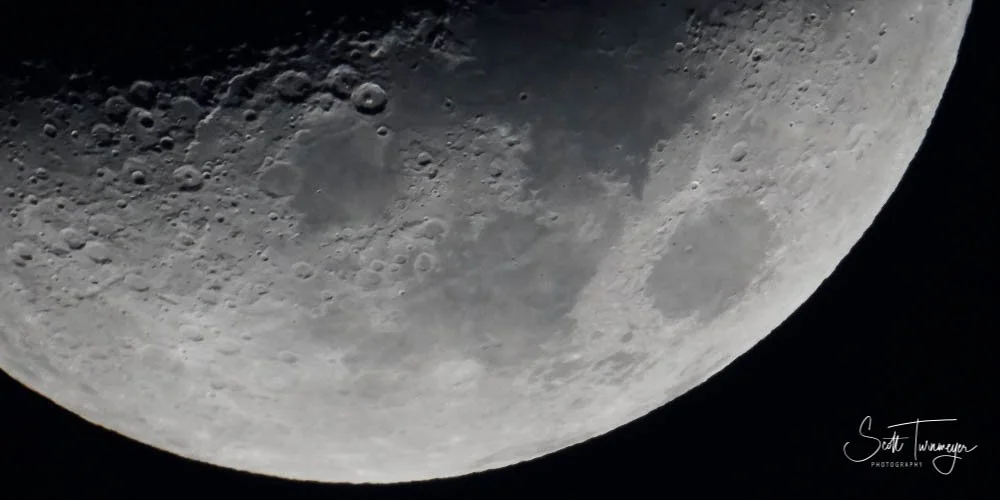
Catching Great Photographs of the Moon
Capturing the beauty of the moon in a photograph is a rewarding challenge for any photographer. The details, textures, and colors of the moon can add depth and mood to any image, but getting the shot just right can be tricky. Here are some practical tips to help you snap those stunning lunar photos you’ve always wanted.
1. Choose the Right Gear
Camera: Any DSLR or mirrorless camera with manual controls will work best. Having a camera that allows you to adjust settings like ISO, shutter speed, and aperture will give you more control.
Lens: A telephoto lens, ideally 200mm or higher, will bring you closer to the moon’s surface, revealing details that are invisible to the naked eye. If you don’t have one, try using a lens extender or teleconverter.
Tripod: To avoid blur, especially with long focal lengths, use a sturdy tripod. Since lunar photography sometime requires longer exposure times, a stable tripod is essential for sharp shots.
Remote Shutter or Timer: Pressing the shutter button can cause slight vibrations, which can affect clarity. Use a remote shutter or the camera’s timer function to eliminate this risk.
2. Set Your Camera Properly
Shoot in Manual Mode: This allows you to adjust all settings manually, which is essential because automatic settings often can’t handle the brightness of the moon against a dark sky.
ISO: Set your ISO low, around 100 to 200, to avoid noise. The moon is surprisingly bright, so a low ISO will capture details more clearly.
Aperture: A medium aperture, like f/8 to f/11, is usually best. It provides a good depth of field and balances light well. The moon if far enough away that you really don’t have to worry about true depth of field, but as the moon is extremely bright so you have flexibility here.
Shutter Speed: The moon moves faster than you might think, so if you use too long of an exposure, it will appear as a blur. Start around 1/125s and adjust depending on your results. If the moon looks too bright, go faster; if it’s too dark, slow down the shutter. You may want to try fast shutter speeds for longer lenses. Some times I have taken shots hand held at a shutter speed of 1/800 but you will have to adjust ISO and Aperture to make sure you are getting the proper exposure.
3. Mind the Moon’s Phase and Position
Full Moon vs. Crescent: While a full moon may seem like the obvious choice, it can be challenging to photograph as its brightness washes out surface details. Crescent and quarter moons show shadows and craters in more detail due to side lighting.
Time of Day: Shooting when the moon is low on the horizon (just after it rises or before it sets) gives it a warmer, more dramatic hue and often makes it easier to expose correctly.
4. Adjust Your Focus Carefully
Manual Focus: Autofocus can struggle with the moon, so switch to manual focus. Zoom in using live view on your camera screen, then fine-tune the focus until the moon appears sharp.
Infinity Focus: Start by setting your lens to infinity and adjust slightly from there. Every lens is different, so find the exact point where the moon appears sharpest.
5. Experiment with Exposure Bracketing
If your camera has exposure bracketing, use it to take multiple shots at different exposures. The moon’s brightness can be hard to capture in a single exposure, so bracketing gives you more flexibility when editing. Later, you can merge these images to capture a wider dynamic range, bringing out more detail.
6. Composition: The Moon with the Landscape
Foreground Interest: Shooting just the moon can be powerful, but pairing it with a landscape or silhouette can add context and a sense of scale. Look for interesting foregrounds like mountains, cityscapes, or trees to make your photo more dynamic.
Timing the Position: Use an app like PhotoPills or The Photographer’s Ephemeris to plan your shoot. These tools allow you to track the moon’s position, rise, and set times based on your location so you can plan your composition perfectly.
7. Editing Tips
After taking your shots, use editing software like Lightroom or Photoshop to enhance contrast, sharpness, and clarity. Subtle adjustments in shadows and highlights can bring out textures on the lunar surface.
Consider Monochrome: The moon often looks striking in black and white, emphasizing its textures and craters, so don’t hesitate to experiment.
Capturing the moon may take some patience, but with the right settings, gear, and timing, you can photograph its stunning details and atmospheric qualities. So grab your camera, head outside on the next clear night, and get ready to shoot for the stars! Happy photographing!


